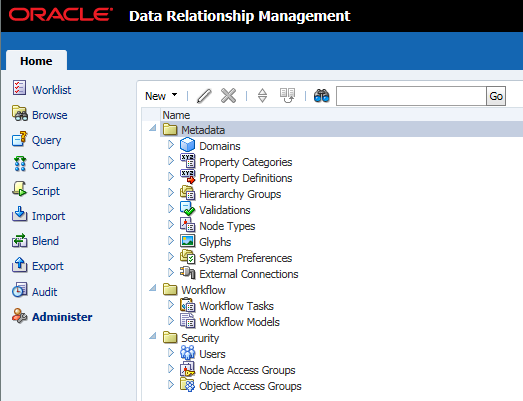
2 - Then Navigate to Administer on the left side pane
3 - Click on Administer and you will see the Administer function open on the right side of your web page
4 - Expand Users link and list of users will appear in your DRM environment
5 - To add user click on the New button and then click on User link to add new user
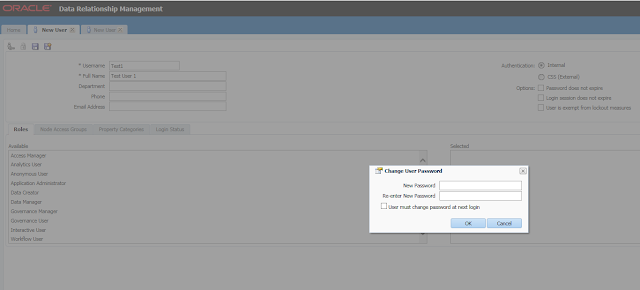
6 - Enter User details. Following are some key points to note:
- Username: (MSAD or Network user id)
- Authentication: (Internal, will create internal users within DRM, CSS External will be authenticated within your Shared Services)
- Internal Authentication will enable all 3 Options: Password does not expire, Login session does not expire and User is exempt from lockout measures
- CSS External will disable Password does not expire and User is exempt from lockout measures. The only option is available is "Login session does not expire"
7 - Next, select the appropriate Role for a specific user. Highlight on the Available role on the left and use the arrow to move it to the right side.
8 - Once the role is added, then click on the Save button on the top left hand corner.
9 - If you selected Internal method for Authentication, you will be prompted to enter a New Password for the user.
10 - User Test1 is now added in your DRM environment.


No comments:
Post a Comment